A small home robot built as an extension of the Waveshare Alphabot kit — used as a mobile surveillance and sensing platform around the house. Raspberry Pi handles the web UI and camera; Arduino (USB) reads the sensor board and feeds a simple status page.
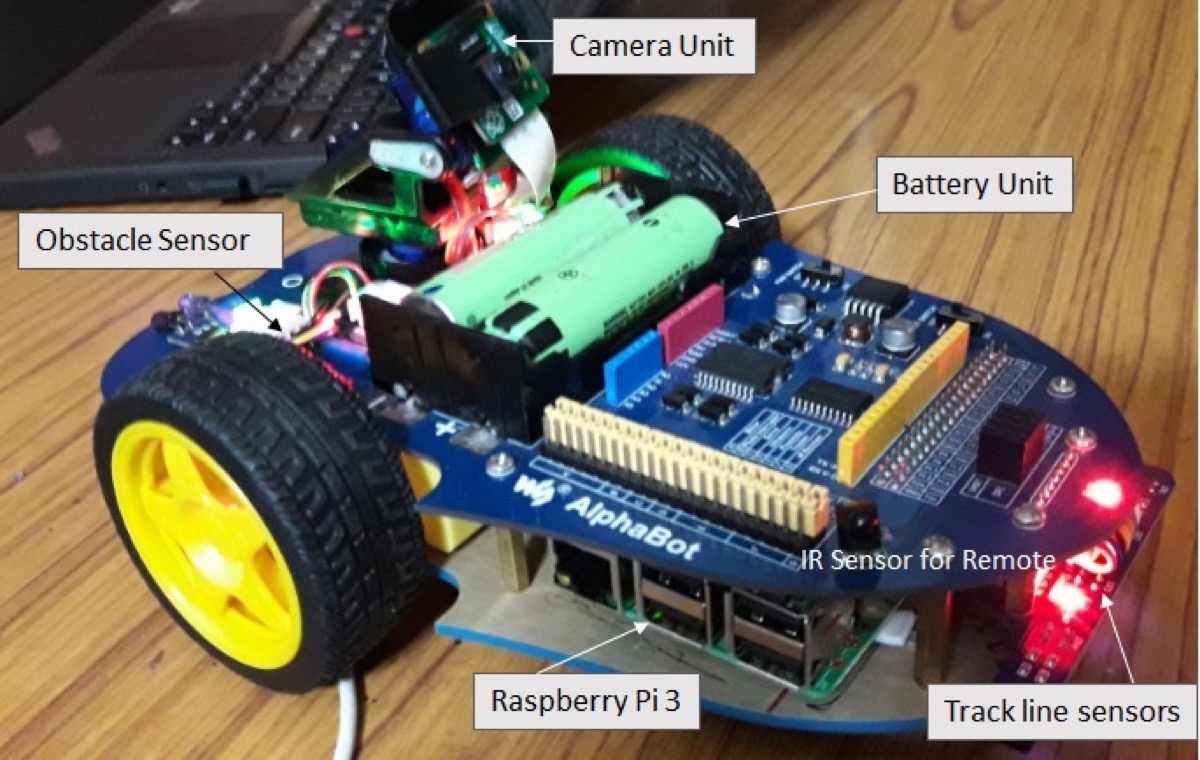
Alphabot base features
- Raspberry Pi & Arduino interface
- Servo motor interface for two drive wheels
- Obstacle-avoidance module interfaces
- Battery holder for 18650 cells (this build also used additional external power)
- Speed measuring interface
- UART interface
- Line-tracking module interface
- IR receiver for remote control
On top of the kit I added a RasPi camera with pan/tilt, plus humidity, temperature, light and smoke sensing (Axelta board and related sensors).
What it can do
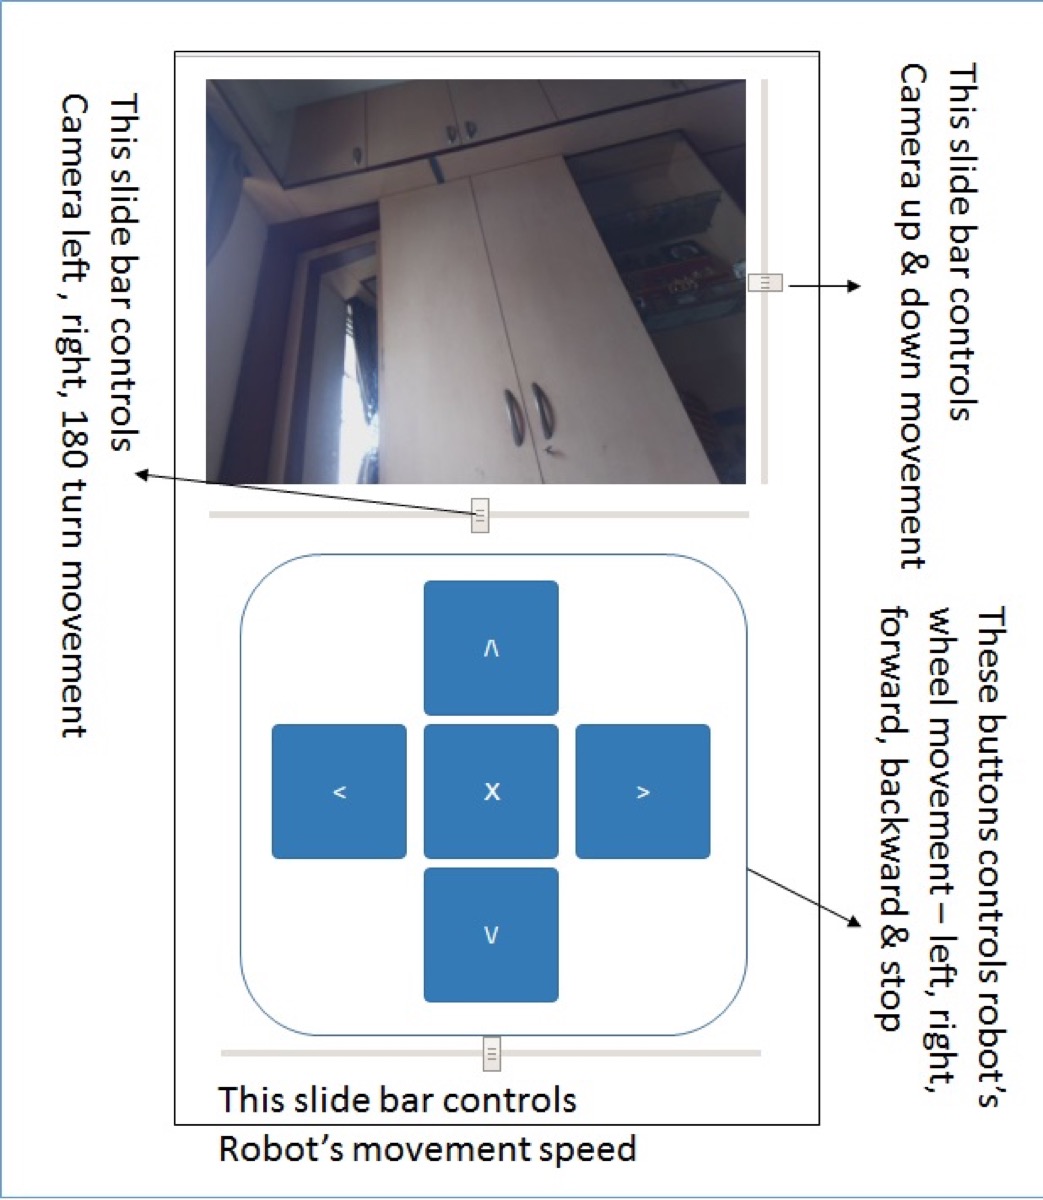
- Drive from anywhere — the Pi has a fixed URL reachable from a browser or phone when internet is available
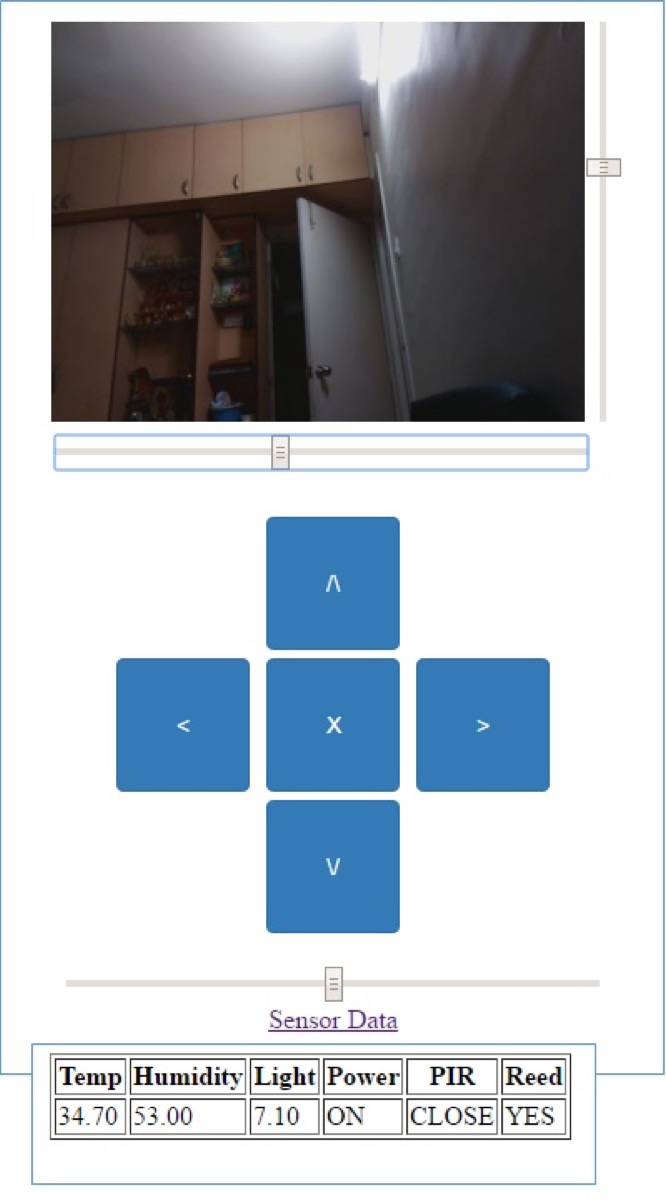
- Camera control — move the camera unit on X/Y/Z from sidebars or touch; drive the chassis with left / right / forward / back / stop
- WebIOPi on the Pi for GPIO/web control; M-JPEG streamer for the live camera feed
- Line tracking — thick black tape path; the robot can follow the guided track
- IR remote maneuvering
- Continuous stills and video — usable as a lightweight CCTV alternative
- Dual obstacle sensors — detect walls/obstacles and correct motion automatically
- Axelta sensor board — humidity, temperature, light level and related readings
- 5 V power bank compatible for untethered runs
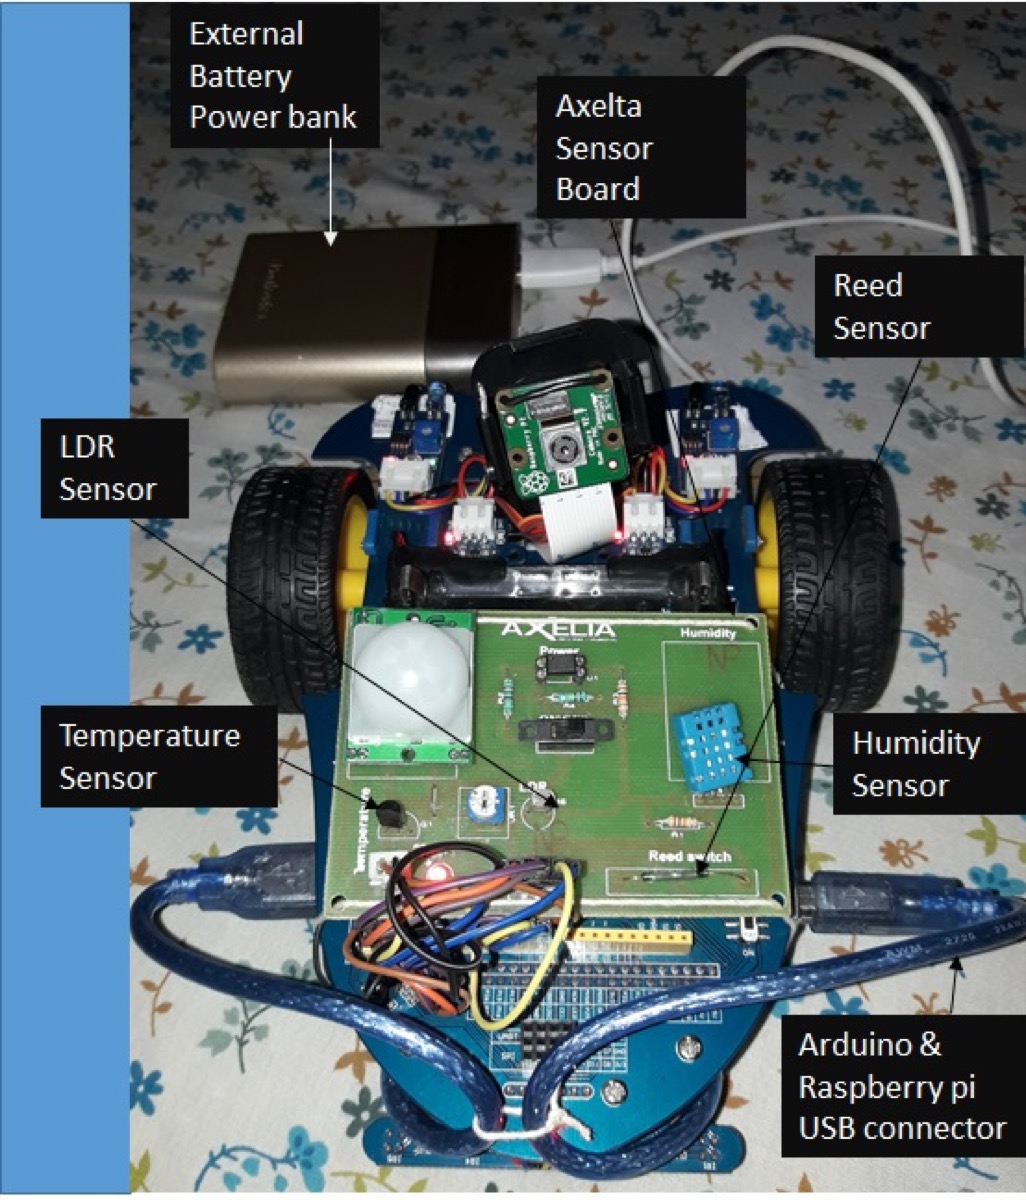
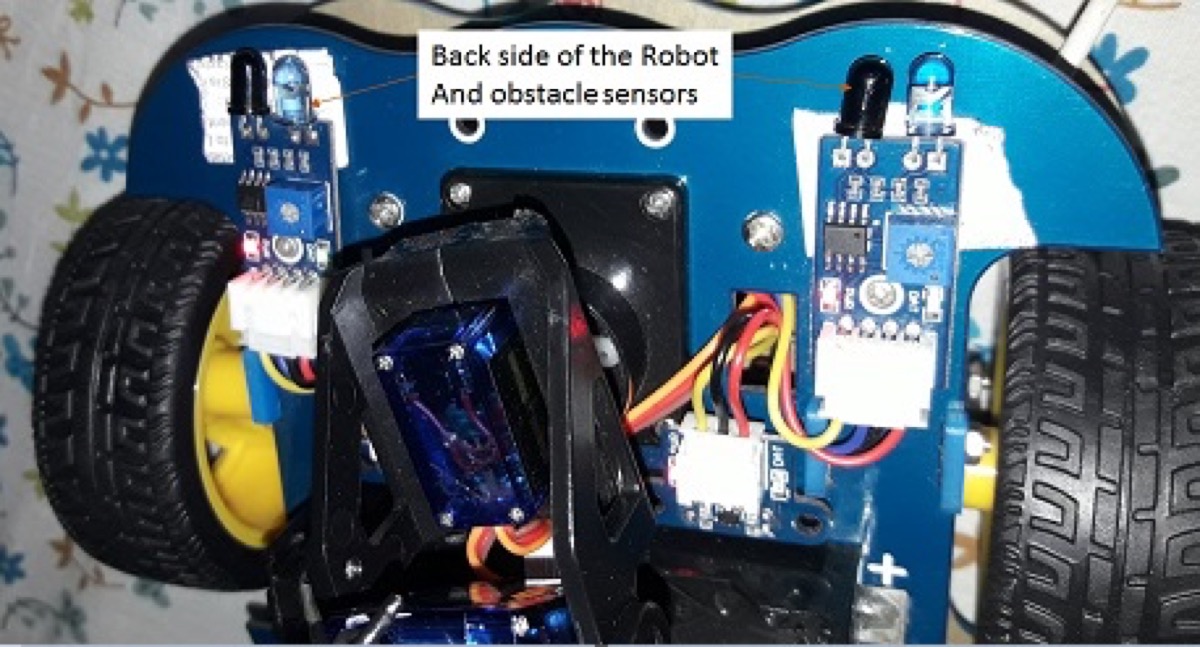
Sensing stack (Arduino)
Arduino talks to the Pi over USB. A small Python program on the Pi reads the serial stream and writes a sensor.html page for the dashboard.
Pins used in the sketch:
| Signal | Pin | Role |
|---|---|---|
| R | 5 | Reed switch |
| P | 6 | Power switch |
| X | 7 | PIR motion |
| T | A2 | Temperature |
| H | A5 | Humidity (DHT11) |
| L | A4 | Light level |
#include <dht11.h>

int R = 5; // reed switch
int P = 6; // power switch
int X = 7; // PIR
int T = A2; // Temperature
int H = A5; // Humidity
int L = A4; // Light

float CELSIUS, HUM, LIGHT;
dht11 DHT11;

void setup() {
  Serial.begin(9600);
}

void TEMPERATURE() {
  int value_temp = analogRead(T);
  delay(10);
  value_temp = analogRead(T);
  delay(10);
  float millivolts_temp = (value_temp / 1023.0) * 5000;
  CELSIUS = millivolts_temp / 10;
  Serial.print(" TEMP: ");
  Serial.print(CELSIUS);
}

void HUMIDITY() {
  DHT11.read(H);
  HUM = DHT11.humidity;
  Serial.print(" HUMIDITY: ");
  Serial.print(HUM);
}

void LIG() {
  int value_lig = analogRead(L);
  delay(10);
  value_lig = analogRead(L);
  float volts_lig = (value_lig / 1023.0) * 5;
  LIGHT = 500 / (4 * ((5 - volts_lig) / volts_lig));
  Serial.print(" LIGHT LEVEL: ");
  Serial.print(LIGHT);
}

void POWER() {
  Serial.print(digitalRead(P) == LOW ? " POWER: OFF" : " POWER: ON");
}

void REED() {
  Serial.print(digitalRead(R) == LOW ? " REED: OPEN" : " REED: CLOSE");
}

void PIR() {
  Serial.print(digitalRead(X) == LOW ? " MOTION: YES" : " MOTION: NO");
  delay(2000);
}

void loop() {
  TEMPERATURE();
  HUMIDITY();
  LIG();
  POWER();
  REED();
  PIR();
  delay(5000);
  Serial.println("");
}
Next step (then)
At the time of writing I was planning BLE tag tracking so the robot could help locate tagged items around the home — an automatic inventory pass on top of the camera patrol.
References
- Tags from the original post:
#IoT·#Raspberrypi·#Arduino·#sensors - Related: A complete home automation solution framework using Hassio · Meet my Raspberry Pi programmed Alexa
This piece was first published on 4 May 2017 as Meet My home surveillance, and is carried here under Technology as part of the digital journey archive.
Filed under
- IoT
- Raspberry Pi
- Arduino
- Sensors
- Surveillance
- DIY